![]()
![]()
![]()
![]()
![]()
DeKruyf Sit or Stand Desk'Nomic Station |
These assembly instructions replace pages 2-5 of the printed assembly manual
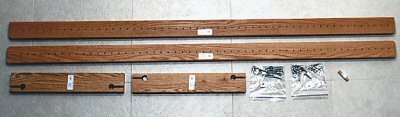 |
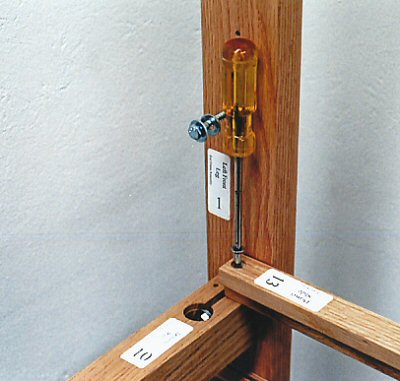
Locate Left Hand End Frame Parts: (1) Part #1, Left Front Leg
|
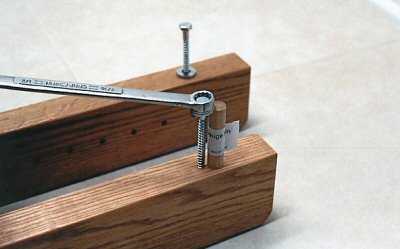 |
Use Gauge Pin to set height of screws. Gauge Pin
7/16" box end wrench |
 |
Arrange legs as
shown
Drop Legs with Screws onto Blocks as shown. Bottom of this Leg marked "LF" |
 |
Make sure both
washers for each screw are located under the head of the screw, and not
between the wood parts. Tighten Screws.
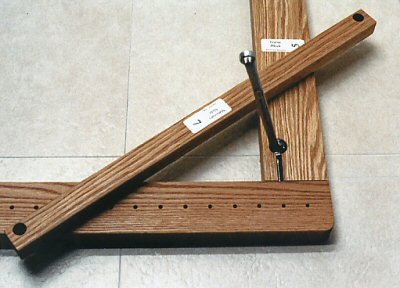
A Stationary Slide can be placed diagonally across Leg and Block while tightening. Apply pressure to Stationary Slide with one hand, while tightening with the other. This will keep the Block and Leg in alignment. Make sure bottom of Leg and Block are flush. Otherwise Desk may rock when assembled. Assemble Right Hand End Frame.
|
 |
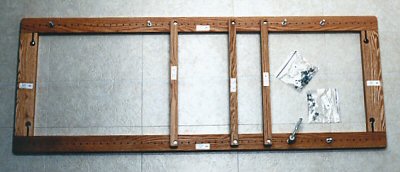
Position Stationary Slides over Legs of End Frame Assemblies as shown. The
Slides have 2 counterboared holes which are offset. Position all
Stationary Slides the same way, with offset holes down.
Measure from the bottom, or count the number of holes. Attach Stationary Slides to Legs of End Frame Assemblies using screws and washers from bag #8. Use a 7/16" socket wrench. Make sure you wax the screws prior to insertion. |
| hole #51 hole #36 hole #15 hole #9 | |
 |
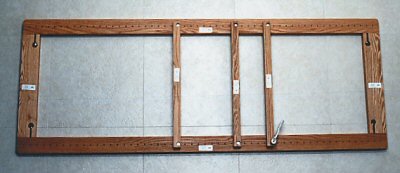
Install 6 screws with 2 washers each, into Legs of Left Hand End Frame as shown. Wax screws prior to insertion, use Gauge Pin to set height. Use hardware from bag #9 Part #1, Left Front Leg Repeat this step for the Right Hand End Frame. Make sure screws at holes # 36 and #51 are in Part #3, Right Rear Leg |
| hole #15 hole #9 | |
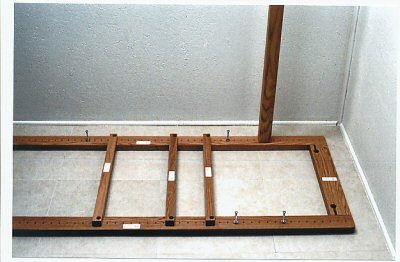 |
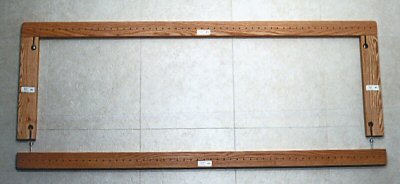
Attach one of the (2) Drawer Rails, Part # 10 onto the screw at hole #15 of the Left Rear Leg, Part #2, of the Left Hand End Frame Assembly. The pockets and holes in the Drawer Rails should face down. Both washers should be under the head of the screws. Do not place a washer between the Rail and Leg. Wax the screw prior to insertion, and use the Universal Gauge Pin to set height. Note: photograph shows Rail being attached at hole #9. This is wrong. Attach Rail at hole #15 |
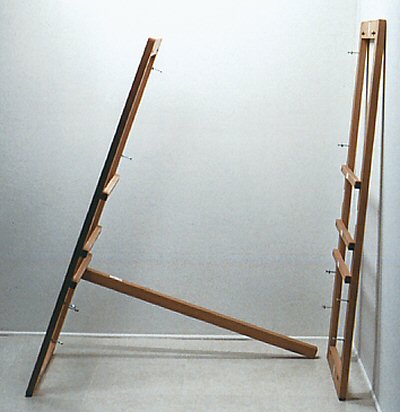 |
Stand End Frame up |
 |
Attach Drawer Rail to the Right Hand End Frame Assembly. Attach another Drawer Rail, Part #10, in the front of the Desk, at hole #15. |
 |
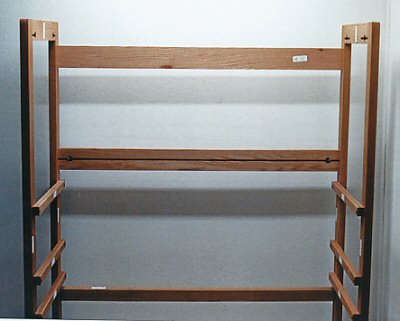
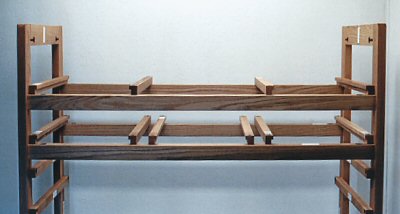
The Desk Frame should now look like this
|
 |
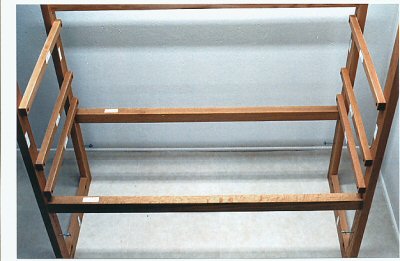
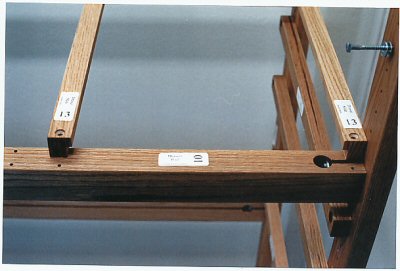
Attach the (2) Frame Rails, Part #11, onto the screws at holes #36 and #51
The Frame Rails can be turned so the slots and pockets face the wall, as illustrated by the top Frame Rail. Once desk is assembled and you begin to position your equipment, these rails can be moved for clearance purposes.
|
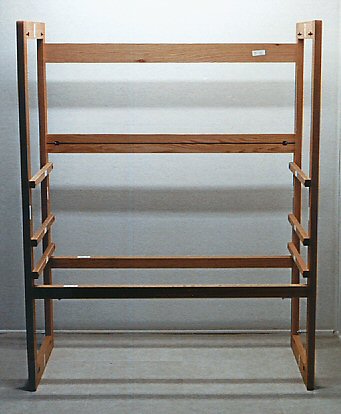 |
The Desk Frame should now look like this |
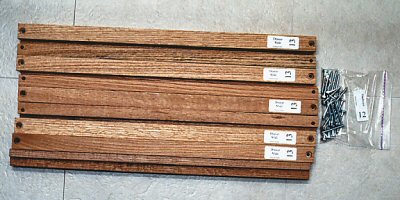 |
Locate the (10) Drawer Slides, Part #13, and Hardware Bag, Part #12. |
 |
Turn entire Desk Frame upside down. Two people make this job easier. Attach (6) of the Drawer Slides, Part #13 to the underside of the Drawer Rail that was installed at hole #15 in an earlier step. Use the screws from Bag #12. Wax screws prior to insertion.
|
 |
Note orientation of the "L" Shaped Drawer Slides. |
 |
Install (2)
remaining Drawer Rails onto the screws at hole #9. Install the remaining (4) Drawer Slides as shown. Turn the Desk Frame right side up, and proceed to page 6 of the printed assembly manual |

